
Weather Station Mounting Ideas
Choose the right mount for your station, property, and maintenance needs—without compromising the readings.
The best hardware still produces poor data when the sensor is too close to roofs, walls, vents, pavement, or trees.
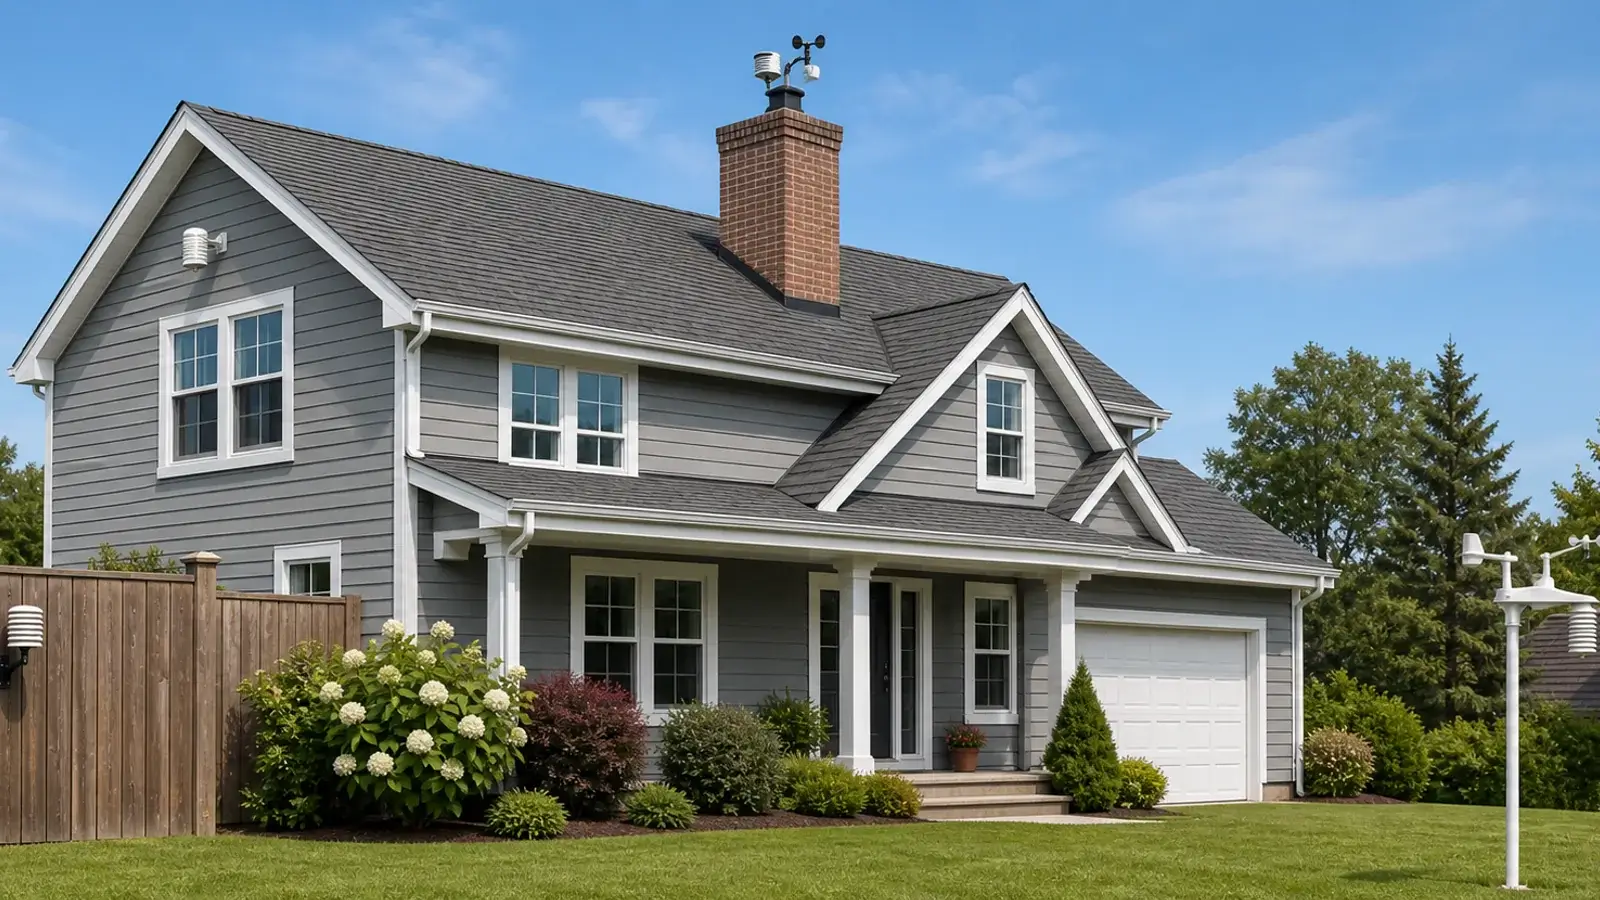
Pitched roof / eaveSide or gable mount
Inactive chimneyDedicated chimney kit
Fence or wallBracket mount
Open yardPole or anchored tripod
Which setup fits your site?
Weather station mount types at a glance
The best mount is the one that safely reaches your best available exposure. Use this comparison to narrow the hardware before checking exact station compatibility.
| Mount type | Works best for | Main advantage | Watch for |
|---|---|---|---|
| Side or gable mount | Pitched roofs, eaves, walls, fence posts | Flexible angle and small footprint | Roof heat, wall turbulence, penetration sealing |
| Tripod | Ground, decks, roofs, temporary sites | Stable base and easy leveling | Anchoring, ballast, guy wires, roof penetrations |
| Non-penetrating platform | Flat roofs and hard surfaces | Ballast avoids drilling | Weight, wind loading, roof capacity, drainage |
| Pole or mast | Open lawns and fields | Best access to cleaner exposure | Foundation, flexing, guying, mowing access |
| Mast-to-mast bracket | Existing antenna or utility masts | Uses a structure already in place | Diameter, load rating, grounding, shared turbulence |
| Chimney strap | Inactive, structurally sound chimneys | No roof-foot penetrations | Heat, exhaust, brick condition, service access |
Choose the mount by location
Every property requires compromises. These are starting points—not substitutes for your station manual, local building requirements, or safe access planning.
Side and eave mounts
Adjustable side mounts work on gables, eaves, vertical walls, and some pitched surfaces. They are useful when you need to clear an overhang without installing a large tripod.
- Fasten into sound structure, not siding alone.
- Keep the sensor above the roof’s turbulent wake.
- Seal any exterior penetrations correctly.
Tripods
Tripods suit open ground, flat surfaces, and roofs. They make plumbing the mast straightforward and can accept extensions when properly anchored or guyed.
- Use stakes, bolts, ballast, or guy wires appropriate to the site.
- Do not assume a roof tripod can be installed without leak planning.
- Check the maximum safe extension height.
Poles and masts
A dedicated pole in an open yard often gives the cleanest compromise for an all-in-one station and makes the rain gauge easier to service than a high roof installation.
- Use a plumb, corrosion-resistant mast.
- Plan the footing and wind load.
- Keep enough access for cleaning and batteries.
Existing masts and fences
Mast-to-mast brackets and stable fence-post mounts can reuse an existing structure. Confirm the structure, bracket, and fasteners can carry the added wind load.
- Match both pipe diameters.
- Avoid loose or flexible fence sections.
- Keep the array clear of the support’s wake.
Chimney mounts
Strap-style mounts can raise a station without placing tripod feet through roofing. Use only on a structurally sound chimney that will not bias temperature or humidity with heat or exhaust.
- Avoid active flues and hot masonry.
- Inspect mortar and straps periodically.
- Plan safe access before choosing the site.
DIY mounts
A well-built post or bracket can work well when it is rigid, plumb, weather-resistant, and compatible with the station’s U-bolts or clamps.
- Do not use thin pipe that flexes in gusts.
- Avoid dark finishes near temperature sensors.
- Document the final height and surroundings.
Mounting and sensor accuracy are inseparable
Professional exposure standards separate wind, temperature/humidity, and rainfall sensors because each measurement has different needs. Most home stations combine them, so the goal is a documented best compromise—not a claim of perfect siting.
Wind benefits from being high and far from obstructions. Temperature, humidity, and rainfall usually benefit from a lower, level, serviceable site over representative ground. If your station allows the anemometer to be separated, you can improve both exposures. If not, favor a location away from heat and splash while raising the array as high and clear as practical.
Record the mounting height and nearby obstructions when sharing data. A consistent, documented residential station can still be very useful even when it cannot meet every ideal standard.
Avoid roofs, pavement, reflective walls, vents, and irrigated microclimates.
Prevent roof splash, tree drip, and rain shadows from nearby objects.
Raise the anemometer above nearby turbulence when safe and practical.
For measurement-by-measurement placement guidance, use the weather station installation and siting guide. If your current readings look suspicious, work through the weather station accuracy guide before applying calibration offsets.
Current mounting hardware to consider
These four current kits map directly to the four common installations shown above. Before ordering, compare the manufacturer’s mast diameter and clamp requirements with your exact station.
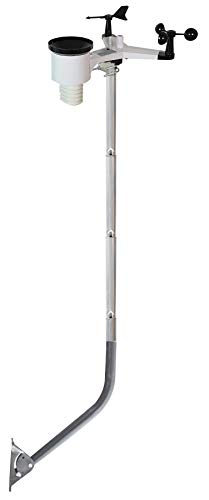
Ambient Weather WeatherMount
An adjustable, powder-coated mount for pitched, flat, or vertical surfaces. Its compact base and angled mast make it the strongest fit here for a roof peak, gable, or eave installation.

Ambient Weather EZ-29-24
A galvanized chimney kit with two 12-foot straps and three 1.25-inch mast sections. It avoids drilling into the masonry, but should be used only where heat, exhaust, maintenance, and safe access are not concerns.
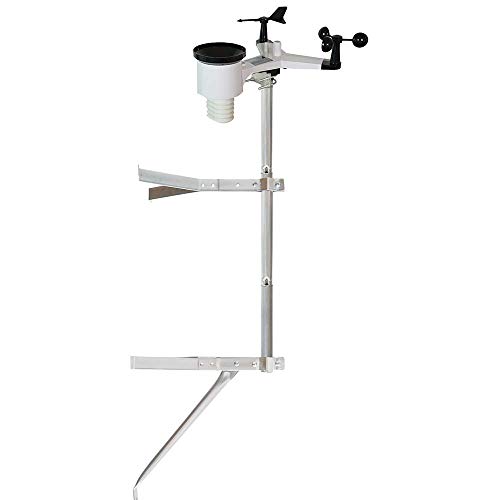
Ambient Weather EZ-30-12
A galvanized gable-style kit with two horizontal brackets, a support brace, and a 1.25-inch mast. It is a practical choice for a sound wall, eave, or fence post with at least 8 inches of mounting width.
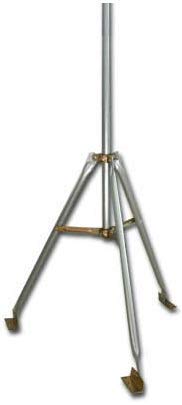
Ambient Weather EZ-48
A universal galvanized tripod with a 1.25-inch mast. Optional stakes suit moderate-wind ground installations, roof installations require appropriate tar pads, anchoring, sealing, and safe access.
Product specifications and Amazon availability checked July 27, 2026. Availability and compatibility can change, confirm the current product page and your station manual before purchase.
Pre-installation checklist
Confirm outside diameter, U-bolt range, and any adapter required.
Pair sensors, check readings, orient moving parts, and confirm wireless range first.
Account for extensions, guy wires, anchors, ballast, and local storm exposure.
A plumb mast protects wind direction. A level rain gauge protects rainfall totals.
Use correct fasteners and professional waterproofing where roofing is penetrated.
Allow safe cleaning, battery replacement, leveling, and post-storm inspection.
Confirm receiver range, solar exposure, cable routing, and battery access.
Record height, ground cover, nearby obstructions, and any calibration offsets.
Frequently asked questions
What is the best weather station mount for most yards?
A dedicated, well-anchored pole in the most open practical part of the yard is often the best residential compromise. It avoids roof heat and keeps the station accessible, although the wind sensor will usually remain below the professional 10-meter standard.
Can I mount a weather station on my roof?
Yes, especially when wind exposure is the priority. Keep temperature and rainfall sensors away from radiant heat, splash, and turbulent airflow, and use appropriate sealing, grounding, and fall protection.
Can I attach a weather station to a fence?
A rigid fence post can support a light station or side bracket, but flexible panels and nearby structures may distort wind readings. Confirm the post, fasteners, mast diameter, and access before installation.
How high should a home weather station be mounted?
There is no single ideal height for an all-in-one array. Temperature/humidity and rain are commonly measured much lower than the professional wind standard, so choose the best safe compromise and document the height.
Should a weather station mast be grounded?
Metal masts and roof installations may require grounding or lightning-protection decisions based on the structure and local codes. Consult a qualified electrician or lightning-protection professional rather than improvising.
Sources and further reading
These official siting recommendations and manufacturer specifications support the mounting choices and hardware examples in this guide.
NWS/CWOP personal weather-station siting guide — Official exposure and siting recommendations for personal stations.
Ambient Weather EZ-48 tripod and mast — Manufacturer specifications for a ground or roof tripod mount.
Ambient Weather weather-station mounting pole — Manufacturer specifications for a dedicated weather-station mount.
Cornell NEWA placement guide — Practical guidance for choosing an open, representative sensor location.