
Weather observation field guide
How to Measure Snowfall Accurately
Measure new snowfall, total snow depth, and liquid equivalent separately. Each uses a different surface, observation method, and reporting precision.
Snowfall totals can differ across short distances, but measurement location, wind, melting, observation time, and clearing schedule can also produce different readings at nearby properties.
A reliable record requires the same representative location, equipment, observation schedule, and reporting precision for each storm.
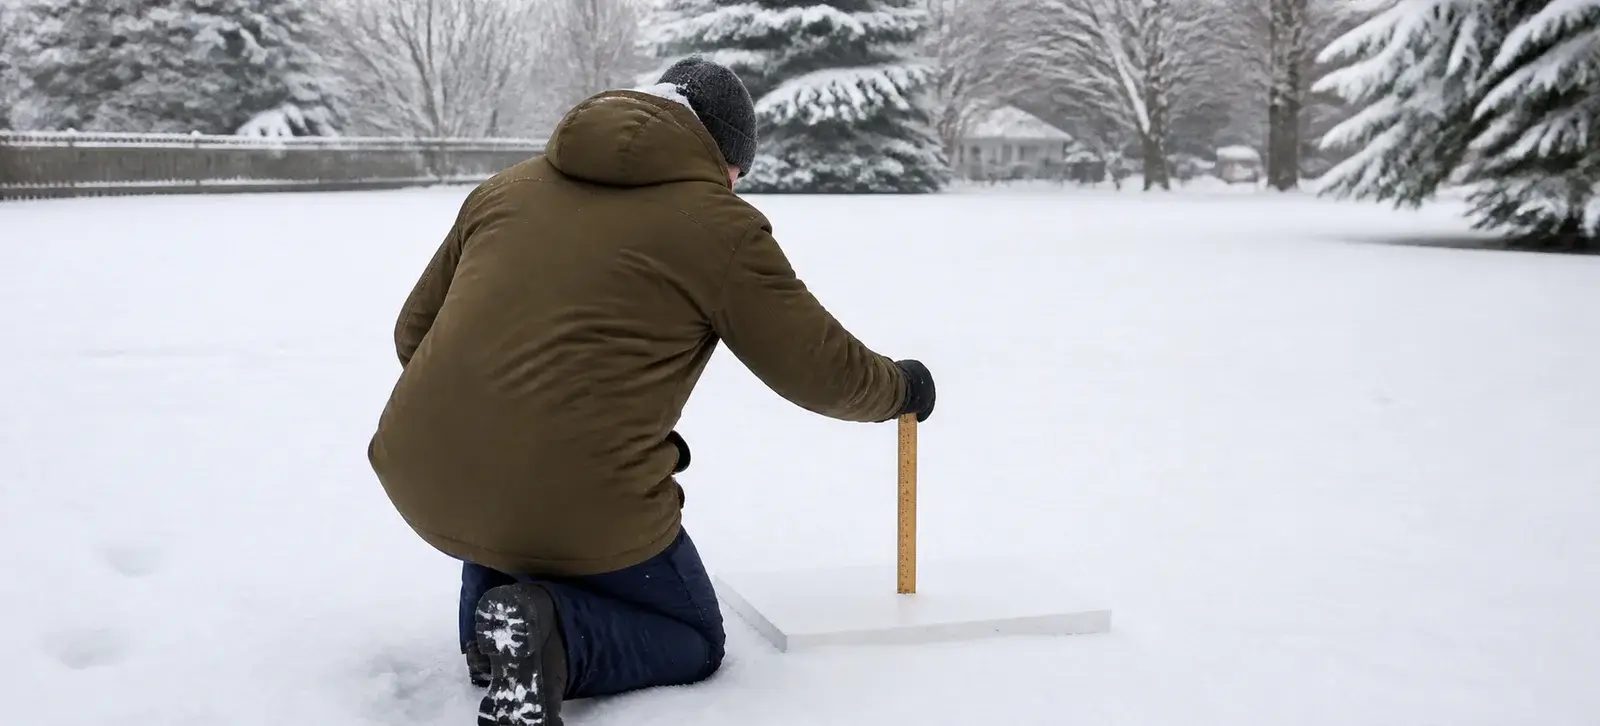
First, know which snow measurement you need
“How much snow did we get?” can mean three different things. Keeping them separate is the key to records that make sense later.
| Measurement | What it means | Typical precision |
|---|---|---|
| New snowfall | Snow, ice pellets, or other frozen precipitation accumulated during a defined observation period. | Nearest 0.1 inch |
| Total snow depth | All snow and ice currently on the ground, including older layers that may have settled or melted. | NWS: whole inch, CoCoRaHS: 0.5 inch |
| Liquid equivalent | How much water the new snow contains after it is melted. | Nearest 0.01 inch |
A 7-inch snowfall does not guarantee 7 inches of snow depth the next morning. Existing snow can settle, wind can move it, and warm ground can melt the lowest layer. The familiar 10-to-1 snow ratio is only a rough saying, not a rule. Real snow-to-liquid ratios vary widely.
What you need
A simple snow board
CoCoRaHS recommends a flat, white snow board about 16 by 16 inches. A larger existing white board can also provide a firm measuring surface if it is level and placed where snow accumulates uniformly without premature melting.

A ruler you can read easily
Use a sturdy ruler or yardstick with clear markings. A ruler marked in tenths of an inch is convenient for formal reporting. Otherwise, estimate carefully between the standard fraction marks. Push it down only until it touches the board. Forcing it into the surface below adds error.
A marker and a precipitation gauge
A small flag helps you find the board after a heavy storm. If you want liquid equivalent too, use a properly placed precipitation gauge designed to collect snow, or take a representative snow core. A home weather station’s sensors are useful for wind and temperature context, but they do not replace a board and manual snow observation.
Where to put the snow board
Place the board on level ground in an open area that represents the surrounding property. Keep it away from roofs, fences, large trees, parked vehicles, plowed areas, and other objects that create drifting or deposit extra snow. If a wooden deck is used instead, CoCoRaHS advises placing the measurement point at least 20 to 30 feet from the house.
- Do not put it where a plow or snow blower will throw snow.
- Avoid pavement, decks, and other surfaces that store heat.
- Do not use a known drift or wind-scoured patch.
- Mark the location before the storm begins.
If your property is exposed to strong wind, consider using two boards in representative locations. They will not eliminate drifting, but they can show whether one spot is misleading. The same siting principles matter for electronic instruments. See our weather station installation guide for a broader look at exposure.
How to measure new snowfall
- Approach without disturbing the board. Walk on the downwind side if possible and keep footprints away from the measurement area.
- Take representative readings. If accumulation is uneven, measure several points, exclude obvious drifts and wind-scoured minima, and average the representative depths.
- Insert the ruler vertically. Push it straight down until it just touches the board. Keep the ruler perpendicular rather than leaning it through the snow.
- Read to the nearest tenth. View the ruler at snow level and record the value immediately, along with the observation time.
- Clear and reset only on your schedule. For event totals, measure when the snow stops when practical. If snow continues for many hours, official observers may clear a board no more than four times in 24 hours and never more often than every six hours. Add each cleared-board reading for the storm total.

How to measure total snow depth
Total depth is measured on the ground, not on the cleared snow board. At roughly the same time each day, take several readings in representative areas. Avoid bare spots, drifts, plow piles, and depressions. Average those readings and report the result to the nearest whole inch.
Account for partial coverage in the reported depth. NWS guidance gives the example of half the exposed ground being bare and half covered by 6 inches of snow: report an average depth of 3 inches. When less than half of the exposed ground is covered, report a trace.
How to measure the liquid in snow
Liquid equivalent answers a different question: how much water would this snow produce if it melted? Catch the precipitation in a correctly sited gauge, melt the contents indoors, and measure the water to the nearest hundredth of an inch. A representative core from the new snowfall on your board can also be melted when gauge catch is unreliable.
Wind can cause a gauge to undercatch snow, so compare the result with nearby trained observations when accuracy matters. Never assume that 10 inches of snow equals 1 inch of water. Temperature, crystal type, wind, and compaction all change the ratio.
Wind, melting, sleet, and other tricky cases
Drifting or blowing snow
Take multiple readings in representative locations and average them. If the scene is so wind-affected that no value represents the area, record that limitation with the observation rather than presenting false precision.
Melting or settling before you measure
Measure as soon as practical after snowfall ends. If snow melted before the scheduled observation, report what is present and note the melting. Do not estimate a larger number simply because radar suggested more fell.
Sleet or ice pellets
Measure accumulated ice pellets on the board as part of frozen precipitation, and note the type. Freezing rain is different: it forms a glaze on exposed objects and should be reported as ice accretion, not snow depth.
Less than one tenth of an inch
For formal programs, a measurable amount below 0.1 inch is usually recorded as a trace. If you are keeping a personal log, define your convention once and use it consistently.
Before the next storm
- Place a flat white board in a representative open area.
- Mark it with a flag and keep a readable ruler nearby.
- Decide on your observation time before snow starts.
- Record new snowfall, total depth, weather conditions, and time separately.
- Use the same method every storm so your records are comparable.
Turn a backyard measurement into useful weather data
For observations that forecasters and researchers can use, follow the reporting and training requirements of a formal program such as CoCoRaHS or National Weather Service SKYWARN. Our guide to becoming a trained weather spotter explains where that path starts.
Temperature, wind, and siting notes also help explain why one storm behaves differently from another. Before trusting an electronic record, review our guide to weather station accuracy. If you are building a home setup from scratch, our home weather station guide covers the practical choices.
Frequently asked questions
Should I measure snow on grass or concrete?
Use a white snow board on level ground for new snowfall. Concrete, decks, and dark surfaces can store heat and melt the lowest part of the accumulation.
When should I measure snowfall?
Measure as soon as practical after the snow ends, or at a consistent daily observation time. During a long event, do not clear a board more often than once every six hours.
Do I average several snowfall measurements?
When accumulation is uneven, take several measurements, exclude obvious drifts and wind-scoured minima, and average representative depths. Use several representative ground readings for total snow depth as well.
Can I measure snow with a rain gauge?
A gauge can help determine liquid equivalent after the catch is melted, but it does not replace a board for snowfall depth. Wind may also cause a gauge to catch less snow than actually fell.
Why is my measurement different from the airport?
Snowfall can vary over short distances, and siting, wind, elevation, observation time, and clearing schedules all affect totals. Compare methods before assuming either value is wrong.
Sources and further training
- CoCoRaHS: How to Measure Snow
- National Weather Service Greenville-Spartanburg: Snow Measurement Guidelines
- National Weather Service Quad Cities: How to Measure Snowfall
- National Weather Service La Crosse: Why Snow Ratios Are Not Always 10:1
- National Weather Service Jackson, Kentucky: Measuring Ice Accretion